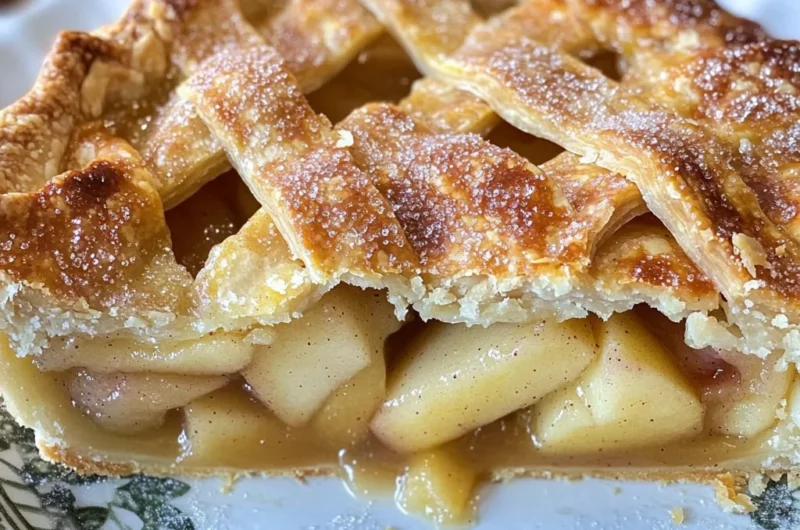
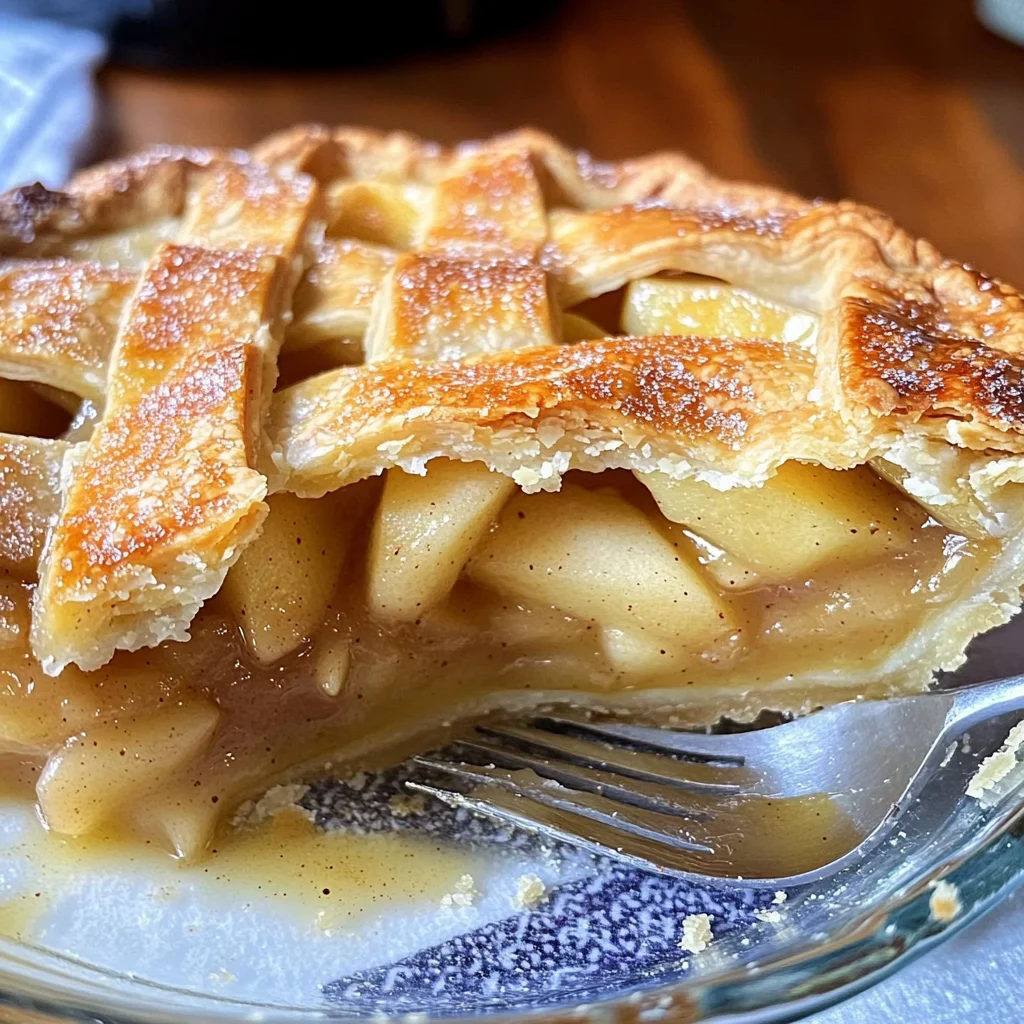
Blue Ribbon Apple Pie is a timeless dessert that combines the tartness of apples with a perfectly flaky crust. This pie is ideal for any occasion, from family gatherings to holiday celebrations. The balance of sweet and tart flavors makes it a standout dish that leaves everyone asking for seconds. With its beautiful presentation and comforting taste, this Blue Ribbon Apple Pie will surely impress your guests and become a cherished recipe in your collection.
Why You’ll Love This Recipe
- Classic Flavor: The combination of Granny Smith and Honeycrisp apples creates a delightful contrast of tart and sweet.
- Perfect Texture: The double-crust technique yields a flaky and buttery crust that enhances the overall experience.
- Versatile Serving Options: Enjoy it warm with a scoop of vanilla ice cream or at room temperature for a delightful treat.
- Family-Friendly: This recipe is easy to follow, making it perfect for bakers of all skill levels, including kids.
- Showstopper Dessert: The golden-brown crust and bubbling apple filling make this pie not only delicious but also visually stunning.
Tools and Preparation
Before you start making your Blue Ribbon Apple Pie, gather all necessary tools. Having the right equipment on hand will streamline the process and ensure great results.
Essential Tools and Equipment
- 9-inch pie plate
- Rolling pin
- Large pot or Dutch oven
- Rimmed baking sheet
- Colander
- Sharp paring knife
- Baking sheet lined with foil
Importance of Each Tool
- 9-inch pie plate: This size ensures your pie has enough room for filling while maintaining structural integrity.
- Rolling pin: A good rolling pin helps achieve an even thickness in your crust for the best texture.
- Large pot or Dutch oven: These provide ample space to cook the apples evenly without overcrowding.
Ingredients
- 1 recipe double-crust pie dough (see note)
- 2 1/2 pounds about 5 firm tart apples, peeled, cored, and sliced 1/4-inch thick (I use Granny Smith)
- 2 1/2 pounds about 5 firm, sweet apples, peeled, cored and sliced 1/4-inch thick (I use Honeycrisp)
- 1/2 cup plus 1 tablespoon granulated sugar
- 1/4 cup packed light brown sugar
- 1/2 teaspoon grated fresh lemon zest
- 1/4 teaspoon salt
- 1/8 teaspoon ground cinnamon
- 2 teaspoons fresh lemon juice
- 1 egg white (beaten lightly)
How to Make Blue Ribbon Apple Pie
Step 1: Prepare the Pie Crust
Roll out one half of the pie dough and place it in a 9-inch pie plate. Trim the crust to fit the edge of the plate. Refrigerate until you’re ready to fill it.
Step 2: Cook the Apples
In a large pot or Dutch oven, toss together the apples, 1/2 cup granulated sugar, brown sugar, lemon zest, salt, and cinnamon. Cook over medium heat while stirring frequently until the apples are tender yet firmabout 10 to 12 minutes. Avoid overcooking since they will soften further during baking.
Step 3: Cool the Apples
Transfer the cooked apples and their juice onto a rimmed baking sheet in an even layer. Allow them to cool to room temperature for about 30 minutes.
Step 4: Preheat Your Oven
Preheat your oven to 425 degrees Fahrenheit. Drain the cooled apples using a colander while saving about 1/4 cup of their juice. Mix this reserved juice with lemon juice.
Step 5: Assemble the Pie
Spread the cooled apple mixture into your dough-lined pie plate, mounding slightly in the center. Drizzle with the lemon juice mixture for added flavor.
Step 6: Add Top Crust
Roll out your second piece of dough and lay it over your filled pie. Trim so theres about a quarter-inch overhang all around. Tuck this overhang under the bottom crust to seal it well, then crimp edges as desired.
Step 7: Vent & Brush
Cut four slits into the top crust using a sharp paring knife for venting steam. Brush lightly with beaten egg white and sprinkle remaining granulated sugar on top.
Step 8: Bake Initial Bake
Place your pie on a foil-lined baking sheet to catch any drips while baking. Bake at high heat until golden brownapproximately 25 minutes.
Step 9: Final Bake
Lower your oven temperature to 375 degrees Fahrenheit for continued baking until juices bubble up through vents and crust becomes deep golden brownanother approximately 25 to 30 minutes.
Step 10: Cool Before Serving
Let your Blue Ribbon Apple Pie cool on a wire rack until filling setsabout two hours. Serve slightly warm or at room temperature for best results!
How to Serve Blue Ribbon Apple Pie
Serving your Blue Ribbon Apple Pie can elevate the experience, making it even more delightful. Here are some fantastic serving suggestions to enhance your pie.
A La Mode
- Top each slice with a scoop of vanilla ice cream for a classic combination that balances the pies tartness.
Whipped Cream
- Lightly sweetened whipped cream adds a creamy texture that complements the apple filling perfectly.
Caramel Sauce
- Drizzle warm caramel sauce over the pie for an extra layer of sweetness and richness.
Cheddar Cheese
- A slice of sharp cheddar cheese on the side provides a savory contrast to the sweet apples.
Fresh Berries
- Serve with a handful of fresh berries like raspberries or blueberries for a burst of color and freshness.
Coffee or Tea
- Pairing with a cup of coffee or tea offers a warm beverage that enhances the comforting flavors of the pie.
How to Perfect Blue Ribbon Apple Pie
Creating the perfect Blue Ribbon Apple Pie involves attention to detail. Here are some tips to ensure your pie is a hit every time.
- Use Fresh Apples: Select firm and tart apples like Granny Smith for balance, along with sweet ones like Honeycrisp for depth of flavor.
- Dont Overcook Apples: Cook apples just until tender; they will continue cooking in the oven.
- Chill Dough: Ensure your pie dough is well-chilled before rolling out to achieve a flaky crust.
- Vent Properly: Cut slits in the top crust to allow steam to escape, preventing sogginess.
- Bake on Foil: Use a foil-lined baking sheet beneath the pie to catch any drips, keeping your oven clean.
- Let it Cool: Allowing the pie to cool for at least two hours helps set the filling for perfect slices.
Best Side Dishes for Blue Ribbon Apple Pie
Complementing your Blue Ribbon Apple Pie with side dishes can make for an unforgettable dessert experience. Here are some excellent options:
- Vanilla Ice Cream: A classic pairing that adds creaminess and temperature contrast.
- Cheesecake Bites: Mini cheesecake bites offer a rich flavor that contrasts nicely with apple pie.
- Fruit Salad: A light fruit salad can refresh the palate and add brightness.
- Pecan Pie Bars: If you love pies, these bars bring a different flavor profile while staying within theme.
- Pumpkin Spice Muffins: These seasonal favorites provide warmth and spice alongside apple pie.
- Chocolate Chip Cookies: Soft cookies create a delightful mix of textures and flavors when served together.
- Nutty Granola Parfaits: Layer granola with yogurt and fresh fruits for a healthy yet indulgent side option.
- Spiced Chai Latte: This warm drink brings cozy spices that pair beautifully with baked desserts like apple pie.
Common Mistakes to Avoid
Making the perfect Blue Ribbon Apple Pie can be challenging. Here are some common mistakes to watch out for.
- Using the wrong apples: Always choose firm and tart apples like Granny Smith combined with sweet ones like Honeycrisp. This balance creates a delightful flavor.
- Overcooking the filling: Cook the apples just until tender. If you overcook them, they will become mushy in the pie, ruining the texture.
- Skipping the cooling step: Allowing the cooked apples to cool completely is crucial. This step prevents a soggy crust when baking.
- Not sealing the pie properly: Ensure you tuck in and crimp the edges well. A poorly sealed pie can leak juices and make a mess in your oven.
- Ignoring venting: Cutting slits in the top crust is essential for steam release. Without proper venting, your pie may burst during baking.
Storage & Reheating Instructions
Refrigerator Storage
- Duration: Store Blue Ribbon Apple Pie in the fridge for up to 4 days.
- Containers: Use an airtight container or cover it with plastic wrap to maintain freshness.
Freezing Blue Ribbon Apple Pie
- Duration: You can freeze the pie for up to 3 months.
- Containers: Wrap it tightly in plastic wrap and then foil to prevent freezer burn. Label with the date for easy tracking.
Reheating Blue Ribbon Apple Pie
- Oven: Preheat to 350F (175C) and bake for about 15-20 minutes until warmed through. This keeps the crust crispy.
- Microwave: Heat individual slices on medium power for 30-60 seconds. Be cautious as it can make the crust soggy.
- Stovetop: Place slice in a skillet over low heat, covering it with a lid. Heat for about 5-7 minutes until warm.
Frequently Asked Questions
Here are some common questions about making Blue Ribbon Apple Pie.
How do I choose apples for Blue Ribbon Apple Pie?
Select a mix of tart and sweet apples, such as Granny Smith and Honeycrisp, to create a well-balanced flavor profile.
Can I use store-bought pie crusts?
Yes, using store-bought crusts can save time. However, homemade crusts typically yield better flavor and texture.
What is the best way to serve Blue Ribbon Apple Pie?
Serve it warm or at room temperature, optionally topped with vanilla ice cream or whipped cream for added richness.
How can I customize my Blue Ribbon Apple Pie?
Feel free to add spices like nutmeg or ginger or incorporate other fruits like pears for a unique twist on this classic dessert.
Final Thoughts
The Blue Ribbon Apple Pie is not just delicious; it’s also versatile and perfect for any occasion. Customize it as you wish by adding different spices or fruits! Try making this recipe and enjoy a slice of homemade goodness that will delight everyone around your table.
Blue Ribbon Apple Pie
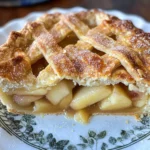
Blue Ribbon Apple Pie is a classic dessert that harmoniously blends the tartness of Granny Smith apples with the sweetness of Honeycrisp apples, all encased in a flaky, buttery crust. Perfect for family gatherings or holiday celebrations, this pie boasts a beautiful presentation and comforting flavors that will leave everyone asking for seconds. Easy to prepare and delightful to serve, its sure to become a cherished recipe in your collection. Whether enjoyed warm with vanilla ice cream or at room temperature, each slice is a delicious reminder of home-baked goodness.
- Prep Time: 30 minutes
- Cook Time: 60 minutes
- Total Time: 1 hour 30 minutes
- Yield: Serves approximately 8 slices 1x
- Category: Dessert
- Method: Baking
- Cuisine: American
Ingredients
- 1 recipe double-crust pie dough
- 5 firm tart apples (Granny Smith), peeled and sliced
- 5 firm sweet apples (Honeycrisp), peeled and sliced
- 1/2 cup granulated sugar
- 1/4 cup light brown sugar
- 1/2 teaspoon grated lemon zest
- 1/4 teaspoon salt
- 1/8 teaspoon ground cinnamon
- 2 teaspoons fresh lemon juice
- 1 egg white (beaten)
Instructions
- Roll out half the pie dough and line a 9-inch pie plate; refrigerate.
- Cook apple slices with sugars, lemon zest, salt, and cinnamon over medium heat until tender but firm (10-12 minutes). Cool on a baking sheet.
- Preheat oven to 425F. Drain and mix cooled apples with reserved juice and lemon juice.
- Fill the pie crust with the apple mixture; cover with top crust, seal edges, and vent.
- Brush with egg white and sprinkle sugar on top.
- Bake on a foil-lined baking sheet at 425F for 25 minutes; reduce heat to 375F for another 25-30 minutes until golden brown.
- Cool for at least two hours before serving.
Nutrition
- Serving Size: 1 slice (115g)
- Calories: 300
- Sugar: 22g
- Sodium: 150mg
- Fat: 14g
- Saturated Fat: 6g
- Unsaturated Fat: 7g
- Trans Fat: 0g
- Carbohydrates: 45g
- Fiber: 3g
- Protein: 2g
- Cholesterol: 25mg