
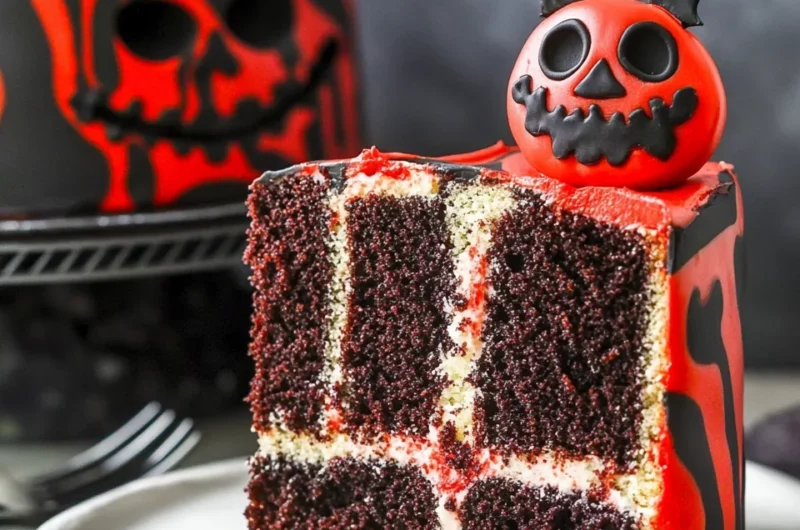
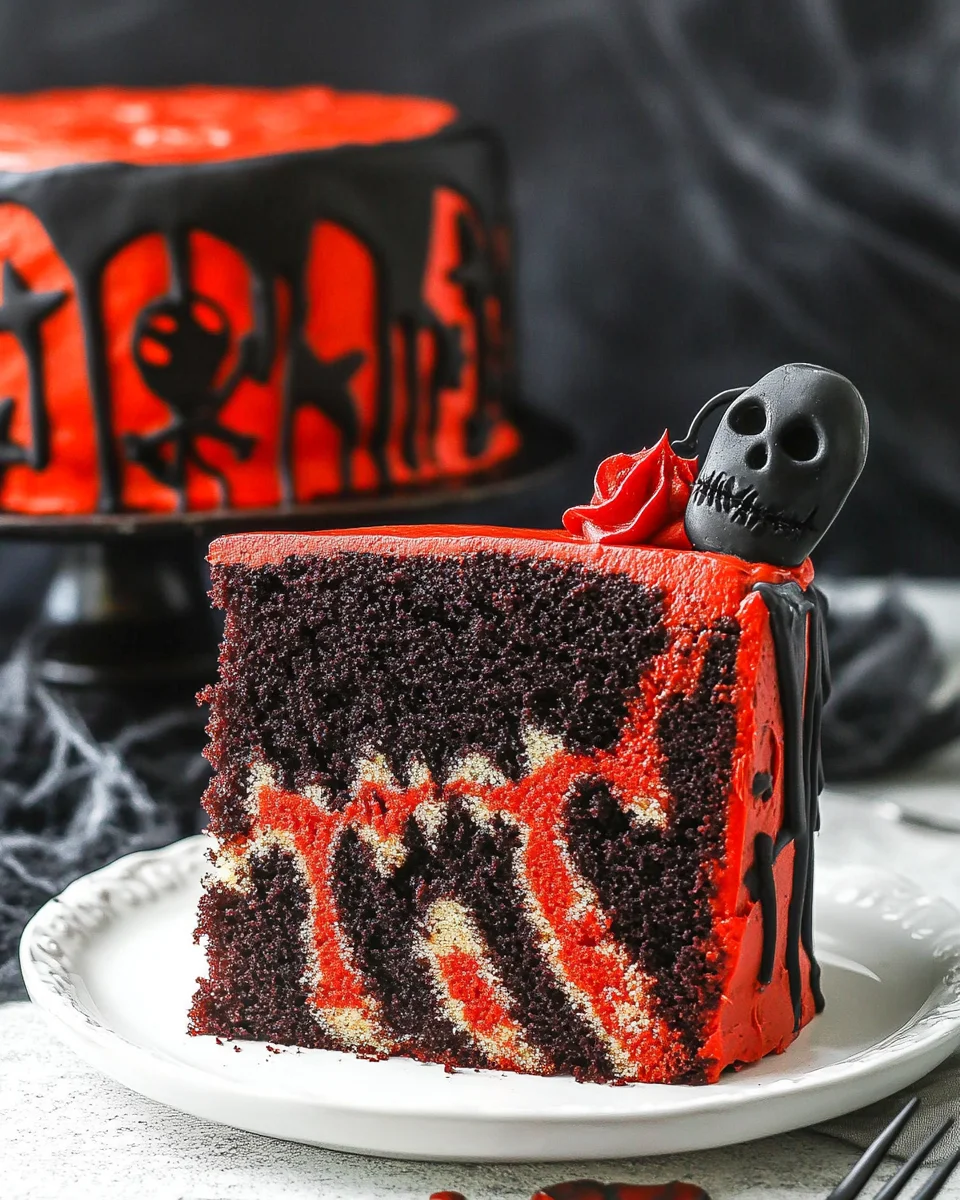
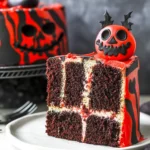
This Spooky Halloween Marble Cake is a delightful and eerie treat perfect for your Halloween parties! Its striking red and black marbled design, combined with drippy red blood decorations and creepy sprinkles, makes it a standout centerpiece. Not only does it taste amazing, but it’s also versatile enough for any fall gathering or spooky celebration.
Why You’ll Love This Recipe
- Eye-Catching Design: The vibrant colors and fun decorations make this cake a memorable addition to any Halloween celebration.
- Delicious Flavor: The combination of chocolate and vanilla flavors creates a deliciously rich cake that everyone will love.
- Easy to Make: With simple steps and common ingredients, even novice bakers can achieve fantastic results.
- Customizable Decorations: Feel free to add your favorite spooky toppings like gummy worms or edible glitter to personalize your cake.
- Perfect for Sharing: This recipe yields 12-14 slices, making it ideal for parties or gatherings.
Tools and Preparation
Before you begin baking this spooky delight, gather all the necessary tools. Having everything ready will streamline your process and ensure that your Halloween Marble Cake turns out perfectly.
Essential Tools and Equipment
- 9-inch round cake pans
- Mixing bowls
- Electric mixer
- Measuring cups and spoons
- Rubber spatula
- Cooling rack
Importance of Each Tool
- 9-inch round cake pans: Ensures even baking and helps achieve the classic cake shape.
- Electric mixer: Saves time and energy when mixing batter, ensuring a smooth consistency.
- Rubber spatula: Perfect for scraping down the sides of bowls and folding in ingredients without losing air.
Ingredients
This is the perfect Spooky Halloween Marble Cake for your Halloween parties! The red and black marble cake is decorated with drippy red blood with bloody bones and bloody eyeball sprinkles!
For the Cake
- 2 1/4 cups (293g) all purpose flour
- 2 1/2 tsp baking powder
- 1/4 tsp baking soda
- 1/2 tsp salt
- 1/2 cup (112g) unsalted butter, room temperature
- 1/2 cup vegetable oil
- 1 1/2 cups (310g) sugar
- 1 tbsp vanilla extract
- 4 large eggs
- 1 cup (240ml) buttermilk
- 5 oz bittersweet chocolate (60% cacao), chopped
For the Frosting
- 2 1/4 cups (504g) unsalted butter
- 8 cups (920g) powdered sugar
- 1 cup (114g) natural unsweetened cocoa powder
- 2 tsp vanilla extract
- 5-7 tbsp (75-105ml) water/cream
- 1/4 tsp salt
For Decoration
- Black gel icing color
- Red gel icing color
- 4 oz red Wilton candy melts
- 2 tbsp heavy whipping cream
- Sprinkles (see notes)
How to Make Spooky Halloween Marble Cake
Step 1: Preheat the Oven
Preheat your oven to 350°F (175°C). This step ensures an even bake for your spooky cake.
Step 2: Prepare the Cake Batter
In a mixing bowl, combine the dry ingredients:
1. Whisk together flour, baking powder, baking soda, and salt in one bowl.
2. In another bowl, cream together unsalted butter, vegetable oil, sugar, and vanilla extract until light and fluffy.
3. Add eggs one at a time, mixing well after each addition.
4. Gradually mix in buttermilk until fully incorporated.
5. Divide the batter into two bowls. Melt bittersweet chocolate and stir into one half. Use black gel icing color to tint the other half.
Step 3: Create the Marble Effect
Grease your prepared cake pans. Alternate spooning dollops of black and red batters into each pan:
1. Use a knife or skewer to swirl them together gently to create a marbled effect.
Step 4: Bake the Cakes
Bake in preheated oven for about 20 minutes or until a toothpick inserted into the center comes out clean. Allow cakes to cool completely on a wire rack before frosting.
Step 5: Frosting & Decoration
Prepare your frosting by beating together unsalted butter, powdered sugar, cocoa powder, vanilla extract, salt, and water/cream until smooth.
Once cooled:
1. Place one cake layer on a serving plate.
2. Spread frosting over the top before adding the second layer.
3. Frost the top and sides of the entire cake.
4. Melt red candy melts with heavy whipping cream to create a drip effect around the edges.
Decorate with black gel icing color for added spookiness along with sprinkles!
Enjoy creating this Spooky Halloween Marble Cake that will surely impress your guests!
How to Serve Spooky Halloween Marble Cake
Serving your Spooky Halloween Marble Cake can be as creative as the cake itself! Here are some fun and spooky serving suggestions that will make your Halloween party a hit.
Individual Cake Slices
- Serve slices on black or orange plates for a festive touch.
- Add a dollop of whipped cream on top for extra creaminess.
Cake Pops
- Use leftover cake to create cake pops, dipping them in dark chocolate for a spooky look.
- Stick them in a pumpkin or a foam block decorated like a graveyard.
Cupcake Versions
- Bake the batter in cupcake liners for individual portions.
- Top with ghostly meringue or buttercream frosting.
Dessert Table Display
- Create a dessert table filled with other Halloween treats alongside the cake.
- Use eerie decorations like spider webs or skulls to enhance the theme.
Themed Drinks Pairing
- Serve with themed drinks like witches’ brew punch or black lemonade.
- Use creepy straws for added flair.
How to Perfect Spooky Halloween Marble Cake
To ensure your Spooky Halloween Marble Cake comes out perfect every time, follow these helpful tips.
- Use room temperature ingredients: This helps the batter mix smoothly and rise better.
- Don’t overmix the batter: Mix just until combined to keep the cake light and fluffy.
- Check baking time: Ovens vary, so start checking your cake a few minutes before the recommended time.
- Let it cool completely: Cooling is crucial before decorating; this prevents melting of frostings and toppings.
- Experiment with colors: Feel free to adjust the gel icing colors for different effects!
Best Side Dishes for Spooky Halloween Marble Cake
Pairing your Spooky Halloween Marble Cake with side dishes can enhance your Halloween celebration. Here are some great options to consider.
- Pumpkin Soup: A warm, creamy soup that adds a seasonal touch.
- Black Bean Salad: A hearty salad that provides a nice contrast to the sweetness of the cake.
- Creepy Cheese Platter: Include cheeses shaped like ghosts or served with dark crackers.
- Mummy Hot Dogs: Fun finger food wrapped in crescent dough to resemble mummies.
- Deviled Eyeballs: Classic deviled eggs made spooky by adding olives as eyeballs.
- Witch’s Fingers Breadsticks: Garlic breadsticks shaped like fingers for an eerie effect.
Common Mistakes to Avoid
Making the perfect Spooky Halloween Marble Cake can be tricky. Here are some common pitfalls and how to avoid them.
- Skipping the Room Temperature Ingredients: Using cold butter or eggs can lead to a dense cake. Ensure all ingredients are at room temperature for a light texture.
- Overmixing the Batter: Mixing too much can make the cake tough. Mix just until combined to retain a tender crumb.
- Incorrect Oven Temperature: Baking at the wrong temperature can affect cooking time. Always preheat your oven and use an oven thermometer if necessary.
- Not Greasing the Pan Properly: A cake that sticks to the pan is frustrating. Use non-stick spray or parchment paper to ensure easy removal.
- Ignoring Cooling Time: Cutting into a warm cake can result in crumbling. Let it cool completely before slicing for neat pieces.
Storage & Reheating Instructions
Refrigerator Storage
- Store leftovers in an airtight container.
- The Spooky Halloween Marble Cake can last up to 5 days in the refrigerator.
Freezing Spooky Halloween Marble Cake
- Wrap individual slices tightly in plastic wrap.
- Freeze for up to 3 months for best quality.
Reheating Spooky Halloween Marble Cake
- Oven: Preheat to 350°F (175°C). Place slices on a baking sheet and heat for about 10 minutes until warm.
- Microwave: Heat on medium power for 15-20 seconds per slice, checking frequently to avoid overheating.
- Stovetop: Use a skillet over low heat, cover with a lid, and warm for about 5 minutes.
Frequently Asked Questions
Here are some common questions about making and enjoying the Spooky Halloween Marble Cake.
How do I achieve the best marble effect?
To create a stunning marble effect, alternate spoonfuls of black and red batter in the pan, then use a knife to swirl gently.
Can I use different colors for Halloween?
Absolutely! Feel free to customize your cake with any gel icing colors that match your Halloween theme.
How should I decorate my Spooky Halloween Marble Cake?
Decorate with drippy red blood, sprinkles, or even candy eyeballs for a more festive look.
What is the best way to serve this cake?
Serve chilled or at room temperature. Pair it with whipped cream or ice cream for added delight!
Can I make this cake ahead of time?
Yes! You can bake and freeze it up to three months ahead. Just thaw and decorate before serving.
Final Thoughts
The Spooky Halloween Marble Cake is not only visually captivating but also deliciously moist and flavorful. It’s perfect for any Halloween gathering or party! Experiment with different decorations or flavors to make it uniquely yours, and enjoy creating spooky memories with friends and family.
Spooky Halloween Marble Cake
Create a spooky centerpiece for your Halloween festivities with this Spooky Halloween Marble Cake. This delightful treat features a mesmerizing red and black marbled design, drizzled with red “blood” decorations and topped with creepy sprinkles. Perfectly moist and rich in flavor, this cake is sure to impress your guests at any fall gathering or haunted celebration. With easy-to-follow steps, even novice bakers can achieve great results. Get ready to enjoy this festive dessert that not only looks stunning but also tastes amazing!
- Prep Time: 20 minutes
- Cook Time: 20 minutes
- Total Time: 40 minutes
- Yield: Serves about 12 slices 1x
- Category: Dessert
- Method: Baking
- Cuisine: American
Ingredients
- 2 1/4 cups all-purpose flour
- 2 1/2 tsp baking powder
- 1/4 tsp baking soda
- 1/2 tsp salt
- 1/2 cup unsalted butter
- 1/2 cup vegetable oil
- 1 1/2 cups sugar
- 1 tbsp vanilla extract
- 4 large eggs
- 1 cup buttermilk
- 5 oz bittersweet chocolate
- 2 1/4 cups unsalted butter (for frosting)
- 8 cups powdered sugar (for frosting)
- 1 cup natural unsweetened cocoa powder (for frosting)
- 2 tsp vanilla extract (for frosting)
- 5–7 tbsp water/cream (for frosting)
- 1/4 tsp salt (for frosting)
- Black gel icing color (for decoration)
- Red gel icing color (for decoration)
- 4 oz red Wilton candy melts (for decoration)
- 2 tbsp heavy whipping cream (for decoration)
- Sprinkles (for decoration)
Instructions
- Preheat the oven to 350°F (175°C) and grease two 9-inch round cake pans.
- In one bowl, whisk together flour, baking powder, baking soda, and salt. In another bowl, cream together butter, sugar, and vanilla until fluffy.
- Add eggs one at a time to the creamed mixture. Gradually mix in buttermilk.
- Divide the batter into two bowls; melt chocolate in one and tint the other with black gel icing color.
- Alternate spooning dollops of batters into each pan and swirl with a knife for a marbled effect.
- Bake for about 20 minutes or until a toothpick comes out clean. Cool completely before frosting.
Nutrition
- Serving Size: 1 slice (100g)
- Calories: 420
- Sugar: 38g
- Sodium: 180mg
- Fat: 22g
- Saturated Fat: 10g
- Unsaturated Fat: 11g
- Trans Fat: 0g
- Carbohydrates: 52g
- Fiber: 2g
- Protein: 4g
- Cholesterol: 75mg