
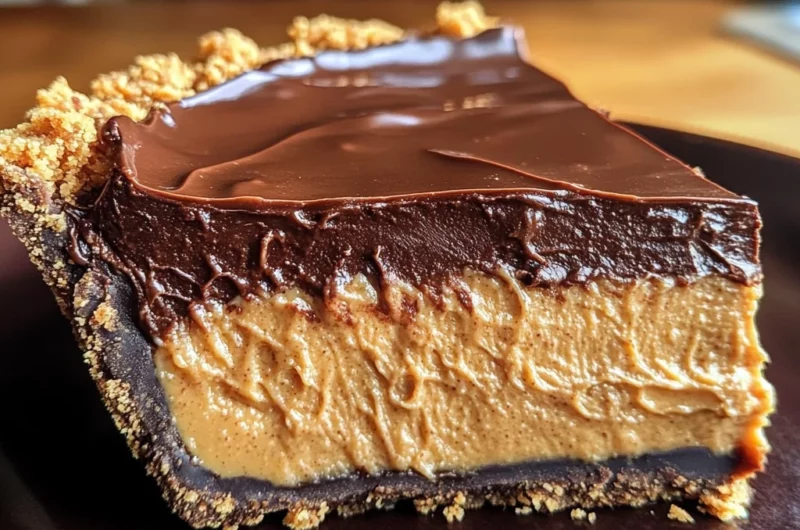
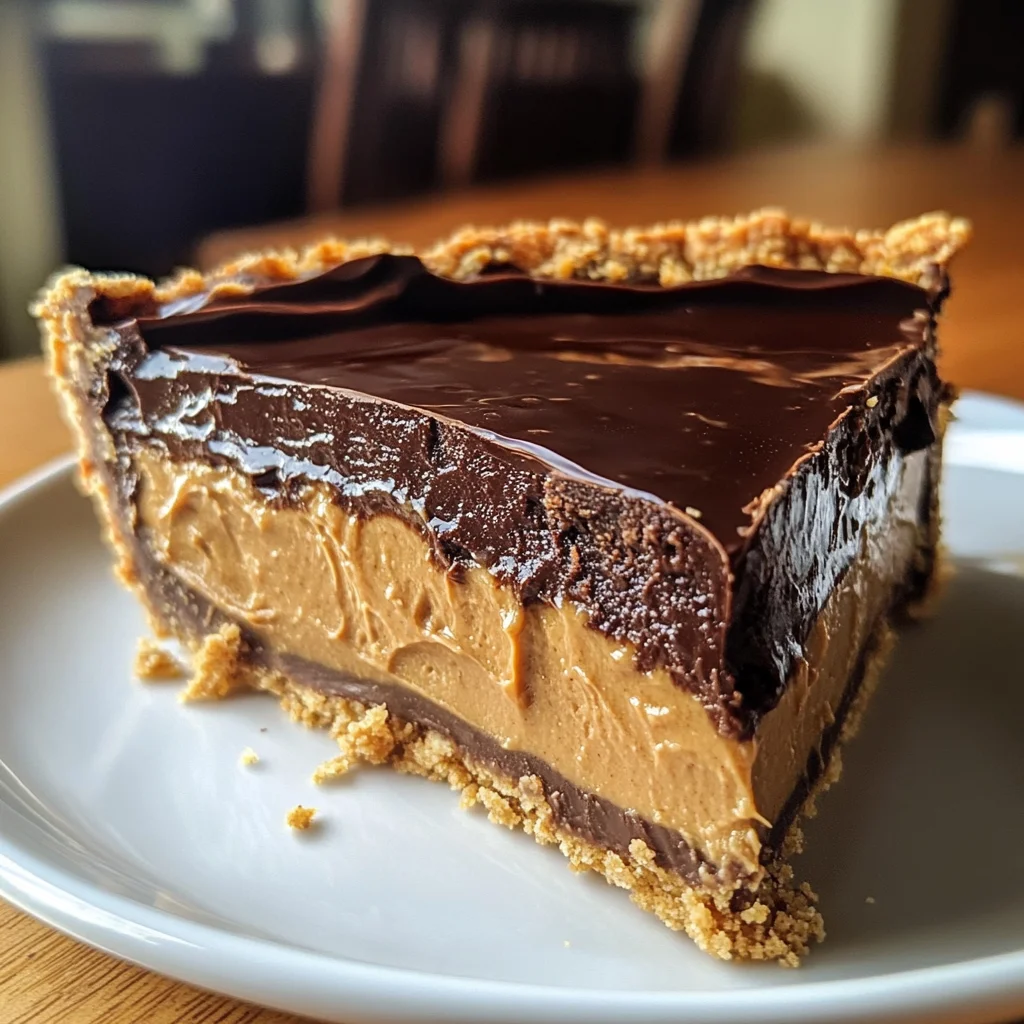
No-Bake Chocolate Peanut Butter Pie: 4 Hour Delight is the ultimate dessert for any occasion. This rich and creamy pie combines the irresistible flavors of chocolate and peanut butter without the hassle of baking. Perfect for family gatherings, parties, or simply treating yourself, this pie will delight everyone with its smooth texture and decadent taste. Plus, it requires just a handful of ingredients and minimal effort, making it an easy yet impressive treat.
Why You’ll Love This Recipe
- Easy to Make: With no baking involved, you can whip this pie up in just 20 minutes!
- Decadent Flavor: The combination of chocolate and peanut butter offers a rich and satisfying dessert experience.
- Versatile Serving Options: Perfect for parties, holidays, or a cozy night in—this pie fits any occasion.
- No Special Skills Required: Even novice bakers will succeed with this simple recipe.
- Chill & Serve: Just prepare it ahead of time and let it chill in the fridge—no last-minute stress!
Tools and Preparation
To make your No-Bake Chocolate Peanut Butter Pie: 4 Hour Delight smoothly, you’ll need some essential kitchen tools. Having the right equipment will streamline the process and ensure great results.
Essential Tools and Equipment
- Mixing bowls
- Pie pan
- Electric mixer or whisk
- Rubber spatula
- Measuring cups
Importance of Each Tool
- Mixing bowls: These are essential for combining ingredients efficiently without mess.
- Electric mixer or whisk: A handy tool for whipping cream to stiff peaks quickly, ensuring a light texture.
- Rubber spatula: Perfect for folding in ingredients gently without deflating the whipped cream.
Ingredients
A delicious no-bake chocolate peanut butter pie that is easy to make and perfect for any occasion.
For the Crust
- 1 ½ cups graham cracker crumbs
- ½ cup unsalted butter, melted
For the Filling
- 1 cup creamy peanut butter
- 1 cup powdered sugar
- 1 cup heavy whipping cream
For the Topping
- 1 cup chocolate chips
- 2 tablespoons milk
How to Make No-Bake Chocolate Peanut Butter Pie: 4 Hour Delight
Step 1: Prepare the Crust
In a bowl, mix graham cracker crumbs and melted butter until well combined. Press the mixture firmly into a pie pan to create an even crust layer.
Step 2: Make the Peanut Butter Filling
In another bowl, combine creamy peanut butter and powdered sugar until smooth.
Step 3: Whip the Cream
In a separate bowl, whip heavy cream with an electric mixer until stiff peaks form. This step adds lightness to your filling.
Step 4: Combine Mixtures
Fold the whipped cream into the peanut butter mixture carefully using a rubber spatula. This keeps your filling fluffy.
Step 5: Assemble the Pie
Spread the peanut butter filling evenly into your prepared crust.
Step 6: Melt Chocolate Topping
Melt chocolate chips with milk in a microwave or on a stovetop until smooth. Pour this chocolate mixture over your peanut butter filling.
Step 7: Chill Before Serving
Refrigerate the pie for at least 4 hours before serving to let it set properly.
Now you have a delightful No-Bake Chocolate Peanut Butter Pie ready to impress!
How to Serve No-Bake Chocolate Peanut Butter Pie: 4 Hour Delight
Serving your no-bake chocolate peanut butter pie can enhance the experience for your guests. Here are some delightful ways to present this dessert that will impress everyone at your table.
Classic Slice
- Serve a generous slice of pie topped with whipped cream for a timeless treat.
Chocolate Drizzle
- Drizzle extra melted chocolate over each slice for added decadence.
Fresh Berries
- Garnish with fresh strawberries or raspberries for a burst of color and flavor.
Ice Cream Scoop
- Pair the pie with a scoop of vanilla ice cream to balance the rich flavors.
Nuts on Top
- Sprinkle chopped peanuts or walnuts on top for an added crunch and nutty flavor.
Coffee Pairing
- Serve alongside a cup of coffee or espresso to complement the chocolate and peanut butter.
How to Perfect No-Bake Chocolate Peanut Butter Pie: 4 Hour Delight
To ensure your no-bake chocolate peanut butter pie is perfect every time, consider these helpful tips.
- Use room temperature ingredients: This helps achieve a smooth texture in your filling.
- Chill properly: Allow the pie to chill for the full four hours to set perfectly.
- Whip cream thoroughly: Make sure your heavy cream is whipped to stiff peaks for the best texture.
- Experiment with toppings: Try different toppings like crushed cookies or caramel sauce for variety.
Best Side Dishes for No-Bake Chocolate Peanut Butter Pie: 4 Hour Delight
Pairing side dishes with your no-bake chocolate peanut butter pie can elevate your dessert experience. Here are some great options that complement this rich treat well.
- Fruit Salad: A refreshing fruit salad can balance the sweetness of the pie.
- Chocolate Mousse: A light chocolate mousse adds an airy touch alongside the rich pie.
- Cheesecake Bites: Mini cheesecake bites provide a creamy alternative that pairs nicely.
- Frozen Yogurt: Serve with frozen yogurt for a cool contrast to the creamy pie.
- Coffee Cake: A slice of coffee cake brings in a delightful crumbly texture that contrasts beautifully.
- Pecan Pie Bars: These add another layer of nutty flavor while keeping in theme with desserts.
Common Mistakes to Avoid
Making the perfect No-Bake Chocolate Peanut Butter Pie: 4 Hour Delight can be a breeze, but there are common pitfalls to watch out for.
- Using the wrong type of crumbs: Always use graham cracker crumbs for the best texture. Avoid cookie crumbs that may alter the flavor.
- Not letting it chill long enough: This pie needs at least 4 hours in the refrigerator to set properly. Don’t rush this step!
- Overmixing the filling: When combining whipped cream with peanut butter, fold gently to maintain airiness. Overmixing can make it dense.
- Skipping the chilling of chocolate: Allow melted chocolate to cool slightly before pouring it over the filling. This prevents melting the peanut butter layer.
- Ignoring serving suggestions: Serve with whipped cream or chocolate shavings on top for an elegant touch. Presentation matters!
Storage & Reheating Instructions
Refrigerator Storage
- Store leftover pie in an airtight container.
- It can last up to 5 days in the refrigerator without losing quality.
Freezing No-Bake Chocolate Peanut Butter Pie: 4 Hour Delight
- Wrap portions tightly in plastic wrap and then in aluminum foil.
- The pie can be frozen for up to 2 months.
Reheating No-Bake Chocolate Peanut Butter Pie: 4 Hour Delight
- Oven: Preheat to 350°F and warm for about 10 minutes. Be cautious not to heat too long.
- Microwave: Use short bursts of 15-20 seconds on medium power, checking frequently to avoid melting.
- Stovetop: Place a slice in a small skillet over low heat for about 5 minutes. Cover to retain moisture.
Frequently Asked Questions
Here are some common questions about making No-Bake Chocolate Peanut Butter Pie: 4 Hour Delight.
Can I use crunchy peanut butter?
Yes, you can! Crunchy peanut butter adds extra texture and flavor, making your pie even more delightful.
How do I make a gluten-free version?
Simply substitute graham crackers with gluten-free alternatives like almond flour or gluten-free cookies for the crust.
What if I don’t have chocolate chips?
You can melt any chocolate bar as a substitute. Just chop it into small pieces before melting.
How long does this dessert last?
The No-Bake Chocolate Peanut Butter Pie: 4 Hour Delight lasts about 5 days refrigerated and up to 2 months if frozen.
Can I add toppings?
Absolutely! Whipped cream, crushed nuts, or drizzled chocolate sauce work well as toppings for added flavor and presentation.
Final Thoughts
The No-Bake Chocolate Peanut Butter Pie: 4 Hour Delight is an indulgent treat that’s simple yet satisfying. Perfect for any occasion, you can customize it by experimenting with different toppings or flavors. Give it a try and impress your friends and family!
No-Bake Chocolate Peanut Butter Pie: 4 Hour Delight
Indulge in the creamy delight of our No-Bake Chocolate Peanut Butter Pie: 4 Hour Delight. This dessert is the perfect combination of rich chocolate and smooth peanut butter, making it a showstopper for any occasion—from family gatherings to cozy nights in. With just a handful of ingredients and minimal prep time, you can create this delectable treat that’s sure to impress your guests. The pie requires no baking, allowing you to whip it up effortlessly in just 20 minutes. Once chilled, each slice reveals a velvety texture that melts in your mouth. Elevate your dessert game with this easy yet indulgent recipe!
- Prep Time: 20 minutes
- Cook Time: None
- Total Time: 0 hours
- Yield: Serves approximately 8 slices 1x
- Category: Dessert
- Method: No-Bake
- Cuisine: American
Ingredients
- 1 ½ cups graham cracker crumbs
- ½ cup unsalted butter, melted
- 1 cup creamy peanut butter
- 1 cup powdered sugar
- 1 cup heavy whipping cream
- 1 cup chocolate chips
- 2 tablespoons milk
Instructions
- Mix graham cracker crumbs and melted butter in a bowl until combined. Press into a pie pan.
- In another bowl, blend creamy peanut butter and powdered sugar until smooth.
- Whip heavy cream in a separate bowl until stiff peaks form.
- Gently fold the whipped cream into the peanut butter mixture using a rubber spatula.
- Spread the filling evenly into the crust.
- Melt chocolate chips with milk and pour over the filling.
- Refrigerate for at least 4 hours before serving.
Nutrition
- Serving Size: 1 serving
- Calories: 410
- Sugar: 23g
- Sodium: 210mg
- Fat: 30g
- Saturated Fat: 14g
- Unsaturated Fat: 16g
- Trans Fat: 0g
- Carbohydrates: 36g
- Fiber: 2g
- Protein: 6g
- Cholesterol: 30mg