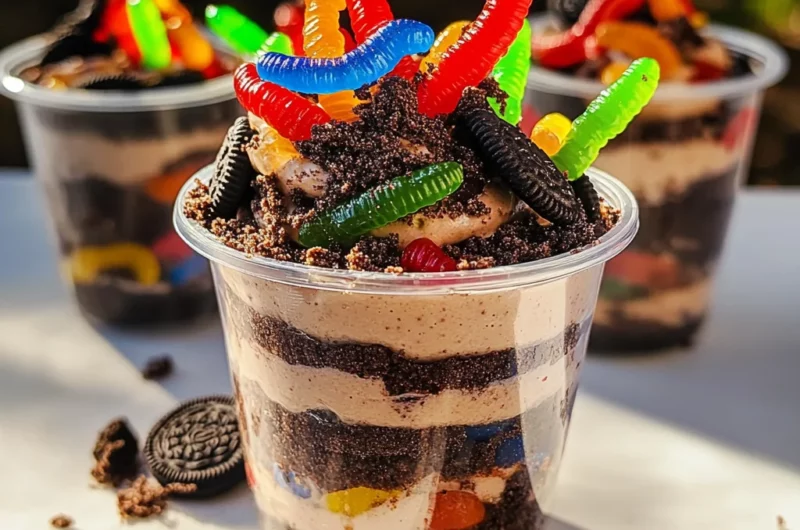
Dirt and Worms Pudding Cups are a delightful treat that brings joy to kids and adults alike! This fun dessert features layers of creamy chocolate pudding, crunchy Oreo cookie crumbles, and colorful gummy worms. It’s perfect for birthday parties, school events, or simply as a creative snack that sparks joy. The playful presentation makes it an eye-catching addition to any gathering, while the easy preparation ensures that you can whip it up in no time.
Why You’ll Love This Recipe
- Easy to Make: With just a few simple steps, you can create these fun pudding cups without any baking.
- Kid-Friendly Fun: Kids love the combination of chocolate pudding and gummy worms, making them a hit at any gathering.
- Customizable: Feel free to change up the toppings or mix in other candies for a personalized touch.
- Quick Preparation: In just 15 minutes, you can have these delicious treats ready for chilling.
- Perfect for Any Occasion: These pudding cups are ideal for birthdays, holidays, or even as a whimsical dessert for family dinners.
Tools and Preparation
Creating your Dirt and Worms Pudding Cups is straightforward with the right tools. Gather your equipment before starting to make the process seamless and enjoyable.
Essential Tools and Equipment
- Mixing bowl
- Whisk
- Measuring cups
- Plastic cups (for serving)
- Spoon or spatula
Importance of Each Tool
- Mixing bowl: A large mixing bowl allows you to combine all ingredients easily without spilling.
- Whisk: Using a whisk ensures that your pudding mix blends smoothly with the milk, avoiding lumps.
- Plastic cups: These are perfect for serving individual portions and add to the fun presentation of your dessert.
Ingredients
For the Pudding
- 1 (3.4 ounce) chocolate pudding mix
- 2 cups cold milk
- 1 (8 ounce) tub Cool Whip
For Toppings
- 20 Oreo cookies, finely crushed
- 24 – 32 gummy worms
For Serving
- 8 plastic cups
How to Make Dirt and Worms Pudding Cups
Step 1: Prepare the Pudding Mix
- In a large mixing bowl, whisk together the chocolate pudding mix and cold milk until well combined. Ensure there are no lumps remaining.
Step 2: Chill the Mixture
- Place the mixture in the refrigerator for about 5 minutes to allow it to thicken slightly.
Step 3: Fold in Cool Whip
- Gently fold the Cool Whip into the pudding mixture until just combined. Be careful not to over-mix; you want to keep it light and fluffy.
Step 4: Assemble Your Cups
- Divide the pudding evenly among your 8 plastic cups.
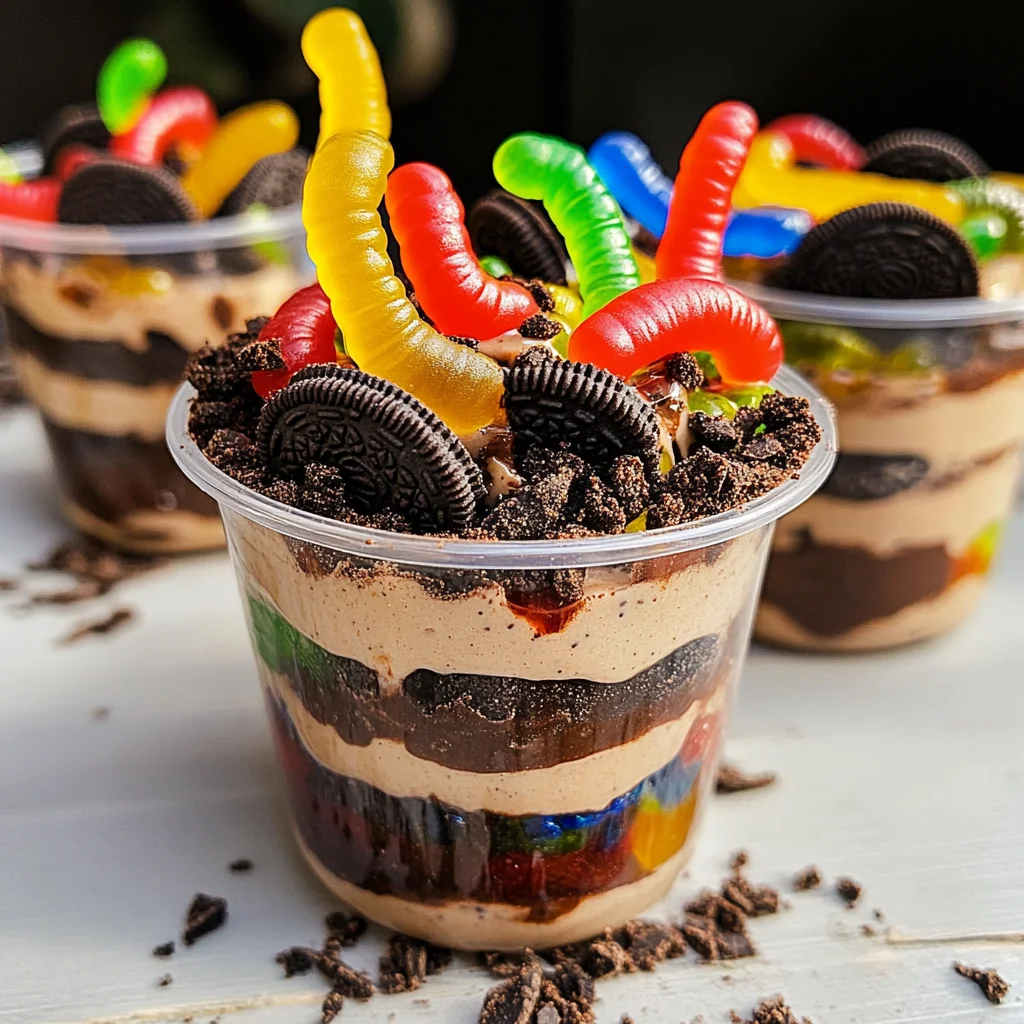
- Top each cup with a generous amount of crushed Oreo cookies. You can also layer them if you prefer a visually appealing look!
Step 5: Final Touches Before Serving
- Chill the assembled cups in the refrigerator until you’re ready to serve.
- Just before serving, garnish each cup with 3-4 gummy worms. Enjoy this delightful treat!
How to Serve Dirt and Worms Pudding Cups
Dirt and Worms Pudding Cups are not only fun to make but also a treat to serve. These delightful dessert cups can be enjoyed in various creative ways, making them perfect for any occasion.
Birthday Party Fun
- Themed Decor: Use colorful plates and napkins with a garden or bug theme to enhance the experience.
- Cupcake Pairing: Serve alongside chocolate or vanilla cupcakes for a sweet combo that kids will love.
Outdoor Picnic Treats
- Portable Delight: Pack the pudding cups in a cooler for a refreshing dessert option at picnics or barbecues.
- Nature-Inspired Setting: Arrange the cups on a picnic blanket surrounded by flowers for an outdoor vibe.
Classroom Celebration
- Individual Servings: Serve in small plastic cups for easy distribution during birthday celebrations at school.
- Fun Activity: Let kids decorate their cups with additional gummy worms or sprinkles before enjoying.
Movie Night Snack
- Cozy Setup: Create a movie night atmosphere with popcorn and Dirt and Worms Pudding Cups for a fun treat.
- Themed Movie Choices: Pair with family-friendly films that feature nature or adventure themes.
How to Perfect Dirt and Worms Pudding Cups
Creating the perfect Dirt and Worms Pudding Cups is all about attention to detail. Here are some tips to elevate your dessert:
- Bold Flavor Boost: Consider adding a splash of vanilla extract to the pudding mix for enhanced flavor.
- Layering Technique: For a visually appealing dessert, layer the pudding and crushed Oreos instead of mixing them together.
- Chill Time Matters: Allow the pudding cups to chill longer before serving for better texture and taste.
- Fresh Ingredients: Use new gummy worms for vibrant colors and chewy texture that kids will love.
- Personalize Toppings: Encourage kids to add their favorite candies or sprinkles on top of their servings.
Best Side Dishes for Dirt and Worms Pudding Cups
Pairing side dishes with your Dirt and Worms Pudding Cups can enhance the overall enjoyment of your meal. Here are some great options:
- Fruit Skewers: Fresh fruit on skewers adds a healthy contrast to the rich pudding.
- Cheese Cubes: A platter of assorted cheese cubes provides a savory bite alongside the sweet treat.
- Veggie Sticks with Dip: Crunchy veggies paired with ranch dip create a balanced snack spread.
- Mini Sandwiches: Small sandwiches cut into fun shapes can complement the playful theme of dessert cups.
- Popcorn Variety: Offer different flavors of popcorn (like cheddar or caramel) as an exciting crunchy side.
- Trail Mix Bar: Set up a trail mix station where guests can customize their own mix, adding nuts, dried fruits, and chocolates.
Common Mistakes to Avoid
Creating Dirt and Worms Pudding Cups can be fun, but there are common mistakes to watch out for.
- Skipping the chilling step. Failing to chill the pudding mixture may result in a runny dessert. Always allow it to thicken in the fridge for at least 5 minutes.
- Not crushing the Oreos finely. If the Oreos are not crushed well, they won’t blend properly with the pudding. Use a food processor or a sturdy bag and rolling pin for even crumbs.
- Using warm milk. Warm milk can affect the texture of your pudding. Make sure to use cold milk for a smoother consistency.
- Overmixing the Cool Whip. Overmixing can cause your Cool Whip to deflate, leading to a less creamy texture. Gently fold it into the pudding until just combined.
- Neglecting garnishes. Forgetting to add gummy worms as a final touch can make your dessert less visually appealing. Don’t skip this fun step before serving!
Storage & Reheating Instructions
Refrigerator Storage
- Duration: Store in the refrigerator for up to 3 days.
- Containers: Use airtight containers or cover each cup with plastic wrap to keep them fresh.
Freezing Dirt and Worms Pudding Cups
- Duration: You can freeze these pudding cups for up to 1 month.
- Containers: Use freezer-safe containers, but avoid adding gummy worms before freezing; they should be added after thawing.
Reheating Dirt and Worms Pudding Cups
- Oven: Not recommended as it may alter the texture of the pudding.
- Microwave: Heat on low power in short intervals if desired; however, it’s best served chilled.
- Stovetop: Reheating is not suitable for this dessert; enjoy it cold straight from the fridge.
Frequently Asked Questions
What are Dirt and Worms Pudding Cups?
Dirt and Worms Pudding Cups are fun dessert cups made with chocolate pudding, crushed Oreos, and gummy worms, perfect for kids’ parties.
How long do Dirt and Worms Pudding Cups last?
When stored properly in the refrigerator, they last about 3 days. For longer storage, consider freezing them without gummy worms.
Can I customize my Dirt and Worms Pudding Cups?
Absolutely! You can add different toppings like crushed candies or use different flavors of pudding to create your unique version.
Are there any variations of Dirt and Worms Pudding Cups?
Yes! You can make variations using vanilla pudding or adding layers of fruit between the pudding and Oreos for added flavor.
How do I serve Dirt and Worms Pudding Cups?
Serve them chilled in individual plastic cups for a fun presentation, topped with extra gummy worms for decoration!
Final Thoughts
Dirt and Worms Pudding Cups are an enjoyable treat that appeals to both kids and adults alike! Their playful presentation makes them perfect for birthday parties or family gatherings. Feel free to customize with different toppings or flavors to suit your taste!
Dirt and Worms Pudding Cups
Dirt and Worms Pudding Cups are a delightful, no-bake dessert that combines the rich flavors of chocolate pudding with crunchy Oreo crumbles and playful gummy worms. This fun, layered treat is perfect for kids’ parties, classroom celebrations, or family gatherings. With just a few simple ingredients and minimal prep time, you can create an eye-catching dessert that will surely bring smiles to everyone’s faces. The whimsical presentation allows for customization as you can mix in different candies or change up the toppings for a unique twist each time. Get ready to whip up these charming cups of joy!
- Prep Time: 15 minutes
- Cook Time: 0 minutes
- Total Time: 15 minutes
- Yield: 8 servings 1x
- Category: Dessert
- Method: No-bake
- Cuisine: American
Ingredients
- 1 (3.4 ounce) chocolate pudding mix
- 2 cups cold milk
- 1 (8 ounce) tub Cool Whip
- 20 Oreo cookies, finely crushed
- 24 – 32 gummy worms
- 8 plastic cups
Instructions
- In a mixing bowl, whisk together the chocolate pudding mix and cold milk until smooth. Chill for 5 minutes to thicken.
- Gently fold in the Cool Whip until combined.
- Divide the mixture into plastic cups and top with crushed Oreos.
- Chill until serving, then garnish with gummy worms.
Nutrition
- Serving Size: 1 cup (160g)
- Calories: 280
- Sugar: 24g
- Sodium: 200mg
- Fat: 13g
- Saturated Fat: 6g
- Unsaturated Fat: 5g
- Trans Fat: 0g
- Carbohydrates: 39g
- Fiber: 1g
- Protein: 3g
- Cholesterol: 10mg
