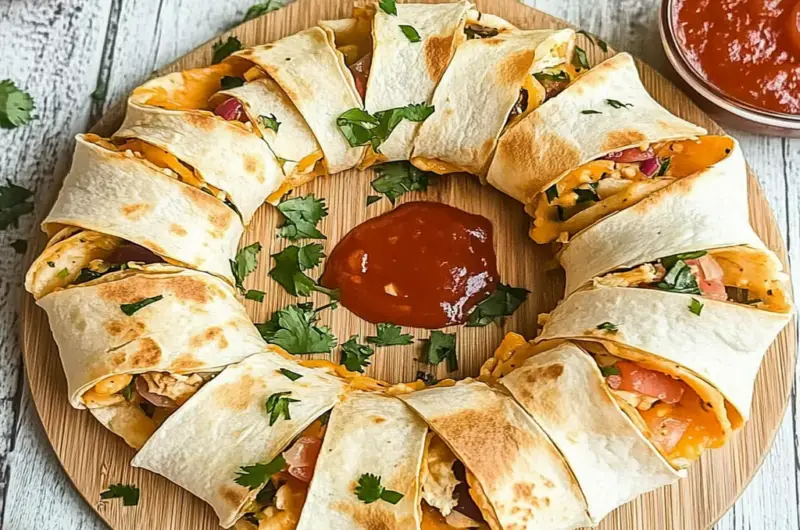
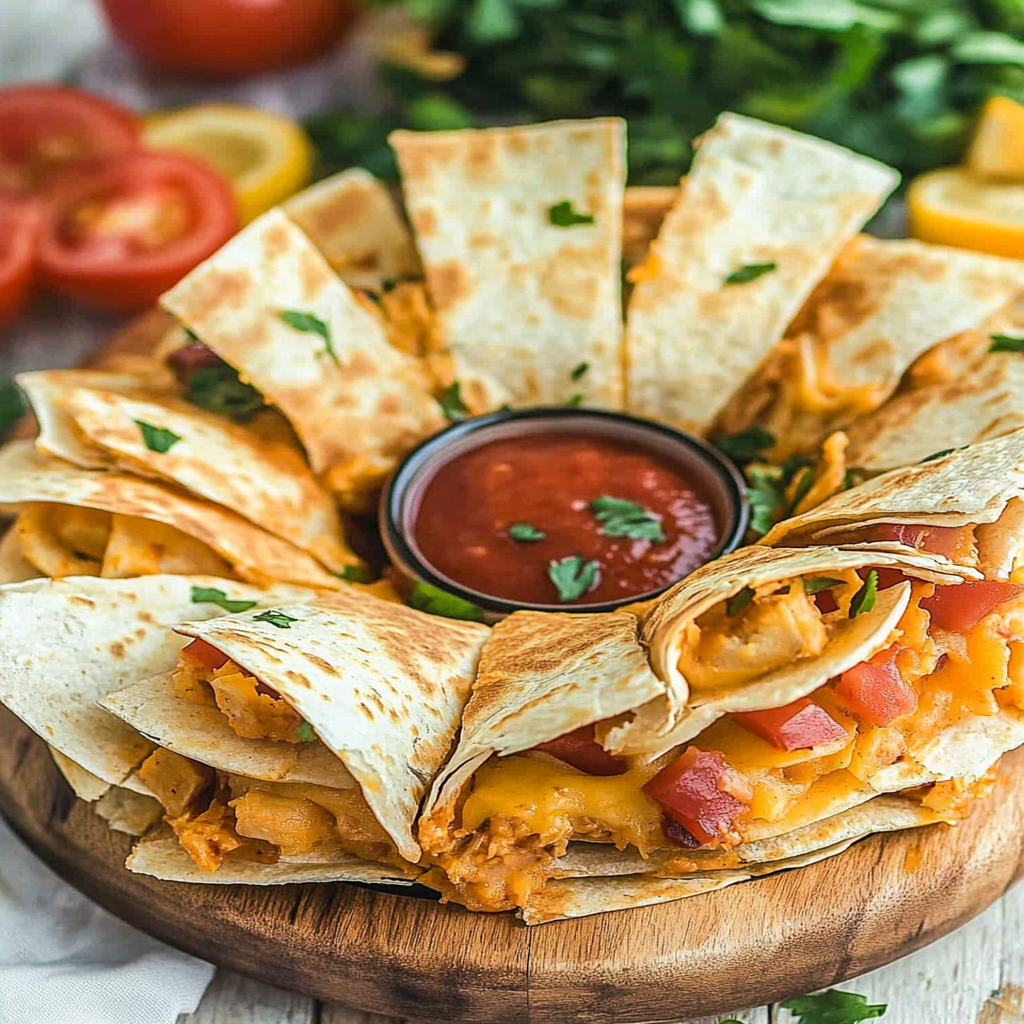
Are you ready to impress your friends and family at your next gathering? The Blooming Quesadilla Ring is not just a visual delight but also a flavor-packed dish that will have everyone coming back for more. This recipe combines the traditional essence of quesadillas with a unique twist that makes it perfect for sharing. Imagine crispy tortillas filled with gooey cheese and zesty ingredients, all shaped into a beautiful ring that blooms open when sliced. It’s easy to prepare and requires minimal cooking skills, making it an ideal option for both novice cooks and culinary pros alike.
Whether you’re hosting a game day party or simply craving a delicious snack, this blooming quesadilla ring is sure to satisfy. In this article, I’ll walk you through everything you need to know about creating this stunning dish from scratch. With simple ingredients and straightforward instructions, you’ll soon be serving up an irresistible centerpiece that looks as good as it tastes. So grab your apron and let’s dive into the delicious world of the Blooming Quesadilla Ring!
Why You’ll Love This Blooming Quesadilla Ring
- Quick and Easy: Minimal prep time and straightforward steps make this recipe stress-free, even for novice cooks
- Flavorful and Versatile: Enjoy outstanding flavor with ingredients you can easily customize by adding your favorites or adjusting spices
- Perfect for Any Occasion: Ideal for casual gatherings, holiday celebrations, or weeknight dinners
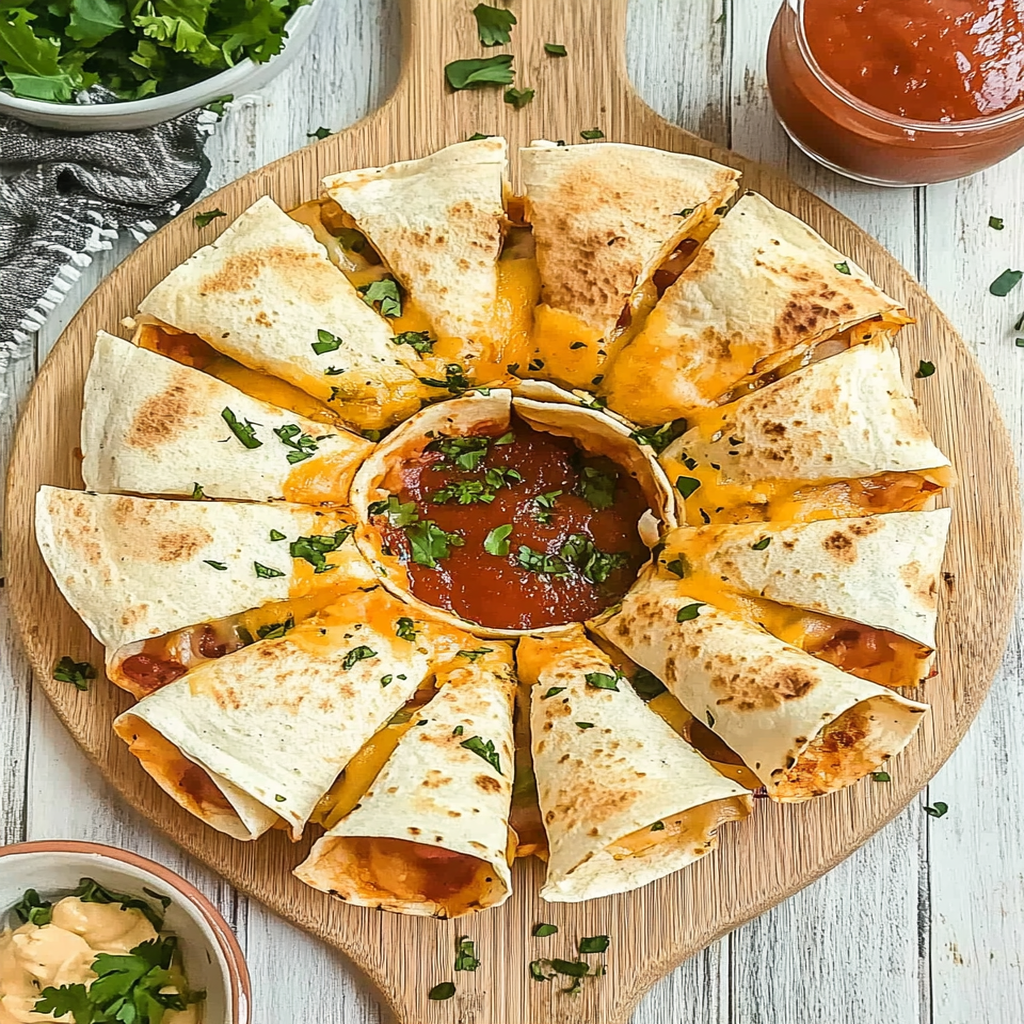
Ingredients for Blooming Quesadilla Ring
Here’s what you’ll need to make this delicious dish:
- Tortillas: Flour tortillas work best for flexibility; choose large ones to accommodate the filling
- Shredded Cheese: A blend of cheddar and Monterey Jack provides great flavor and melting properties
- Cooked Chicken Breast: Shred or chop leftover chicken for convenience; rotisserie chicken is an excellent option
- Bell Peppers: Use colorful bell peppers for added sweetness and texture; diced into small pieces
- Salsa: Choose your favorite salsa variety; it adds moisture and enhances flavors in the quesadillas
- Sour Cream: Perfect as a dipping sauce or spread on top after baking to enhance creaminess
The full ingredients list, including measurements, is provided in the recipe card directly below.
How to Make Blooming Quesadilla Ring
Follow these simple steps to prepare this delicious dish:
Step 1: Preheat Your Oven
Preheat your oven to 400°F (200°C). Prepare a baking sheet by lining it with parchment paper or lightly spraying it with nonstick cooking spray.
Step 2: Prepare Tortillas
Lay out the tortillas flat on your workspace. You will arrange them in a circular pattern later on.
Step 3: Add Filling
On one half of each tortilla, layer shredded cheese, cooked chicken breast, diced bell peppers, and salsa. Be generous but leave some space around the edges.
Step 4: Fold Tortillas
Carefully fold each tortilla in half over the filling, creating a semi-circle shape. Press down gently to seal.
Step 5: Arrange on Baking Sheet
Arrange the folded tortillas in a circular shape on the prepared baking sheet so they form a ring.
Step 6: Bake until Golden
Place in the preheated oven and bake for about 15-20 minutes or until golden brown and crispy.
Transfer to plates and drizzle with sour cream for the perfect finishing touch.
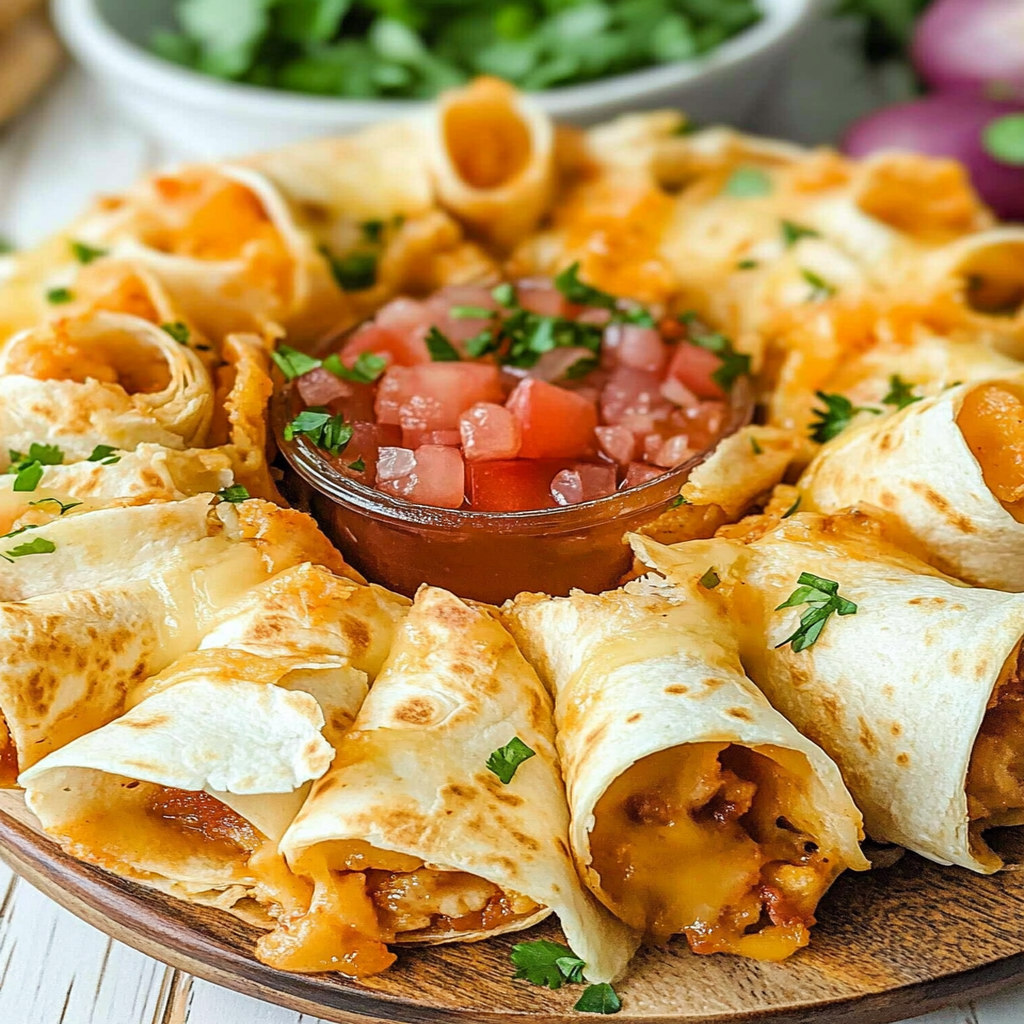
Tips and Tricks
Here are some helpful tips to ensure the best results for your dish:
- Even Cooking: Make sure all ingredients are cut to similar sizes for consistent cooking times
- Temperature Control: Let ingredients reach room temperature before starting for better results
- Make Ahead Option: Assemble the dish beforehand and keep it covered in the fridge until you’re ready to bake
How to Serve Blooming Quesadilla Ring
This Blooming Quesadilla Ring is versatile and pairs wonderfully with:
- Rice or Potatoes: A hearty base that soaks up the delicious sauce.
- Fresh Salad: Adds a crisp and refreshing contrast to the rich flavors of the dish.
- Crusty Bread: Perfect for enjoying every last drop of the flavorful sauce.
Feel free to pair it with your favorite sides for a personalized meal!
Make Ahead and Storage
- Make Ahead: You can prepare components of the Blooming Quesadilla Ring a day in advance. Chop vegetables, cook proteins, and even assemble the quesadilla layers. Store them in airtight containers in the refrigerator for up to 24 hours.
- Storing: If you have leftovers, let them cool completely before placing them in an airtight container. The quesadilla will last for about three days in the fridge. For longer storage, consider freezing it for up to two months.
- Reheating: To reheat, preheat your oven to 350°F (175°C). Place the quesadilla ring on a baking sheet and cover it with foil to prevent drying out. Heat for about 15-20 minutes or until heated through. You can also microwave individual slices for about one minute if you’re short on time.
Suggestions for Blooming Quesadilla Ring
Mistake of Overfilling the Quesadillas
One common mistake when making a blooming quesadilla ring is overfilling the tortillas. While it’s tempting to add as much cheese and filling as possible, too much can lead to a messy result. Excess filling may ooze out during baking, creating a soggy quesadilla rather than a crispy one. To achieve the perfect balance, stick to a moderate amount of fillings like cheese, veggies, and proteins. Aim for about half a cup of filling per tortilla. This ensures that each piece holds together well while providing that delicious flavor without compromising texture.
Forgetting to Preheat the Oven
Another frequent error is neglecting to preheat the oven before baking the blooming quesadilla ring. Preheating is crucial because it helps achieve an even cook and golden-brown color on the outside. If you skip this step, your quesadilla may cook unevenly or become chewy instead of crispy. Always take the time to set your oven to the desired temperature before placing your dish inside. This simple step will enhance both taste and presentation, ensuring that every bite of your blooming quesadilla ring is delightful.
Using Cold Ingredients
Using cold ingredients directly from the refrigerator can negatively affect your blooming quesadilla ring’s outcome. Cold cheese and meats do not melt or blend well with other ingredients, causing an unappetizing texture. Instead, allow your ingredients to come to room temperature before assembling your dish. This small adjustment ensures better melting and flavor integration while enhancing that satisfying, gooey characteristic of a properly made quesadilla.
Skipping the Egg Wash
A frequently overlooked aspect of preparing a blooming quesadilla ring is applying an egg wash before baking. An egg wash creates a beautiful golden-brown finish and adds an appealing shine to your dish. Without this final touch, your quesadillas might look lackluster and uninviting. To apply an egg wash, simply whisk an egg with a tablespoon of water and brush it evenly over the top before placing it in the oven. This step elevates not only the appearance but also enhances overall flavor.
FAQs
What is a Blooming Quesadilla Ring?
A blooming quesadilla ring is a creative twist on traditional quesadillas, shaped into a circular presentation resembling petals or flowers when baked. It typically includes layers of tortillas filled with various ingredients such as cheese, beans, vegetables, and meats arranged in a visually appealing format. The blooms open up when baked, providing easy portioning for sharing at gatherings or parties.
How do I serve a Blooming Quesadilla Ring?
Serving a blooming quesadilla ring is simple and fun! Once baked until golden brown and crispy, let it cool for a few minutes before slicing into sections like a cake. You can serve it alongside salsa, guacamole, sour cream, or any dipping sauce you prefer. The vibrant presentation makes it perfect for entertaining guests or family gatherings since everyone can easily grab their favorite portion.
Can I customize my Blooming Quesadilla Ring?
Absolutely! Customizing your blooming quesadilla ring is one of its best features. You can choose different types of tortillas—flour or corn—and fill them with whatever ingredients you enjoy most. Consider using various cheeses like cheddar or pepper jack for added flavor or incorporating seasonal vegetables for freshness. Proteins such as chicken or beef work well too; just remember to keep portions balanced for optimal results.
How long does it take to prepare a Blooming Quesadilla Ring?
Preparing a blooming quesadilla ring typically takes about 30 minutes from start to finish if you have all ingredients ready. Assemble your fillings within 15 minutes before carefully layering them into the desired shape on your baking sheet. Afterward, bake for approximately 20-25 minutes until perfectly golden brown and crispy—perfect timing for social gatherings or family dinners!
Conclusion for Blooming Quesadilla Ring
In conclusion, making a delicious blooming quesadilla ring involves paying attention to details that elevate both flavor and presentation. Avoid common mistakes such as overfilling tortillas or forgetting to preheat the oven; these steps are essential for achieving optimal results. Remember that customizing ingredients allows flexibility in flavors while keeping preparation straightforward and enjoyable. By following these guidelines closely—from proper ingredient temperatures to using an egg wash—you’ll create an eye-catching dish sure to impress everyone at your table! Enjoy sharing this delightful recipe with family and friends!
Blooming Quesadilla Ring
Elevate your next gathering with the gorgeous and delicious Blooming Quesadilla Ring. This stunning dish combines crispy flour tortillas stuffed with gooey cheese, tender chicken, and vibrant bell peppers, all arranged in a visually appealing circular formation. As it bakes, the quesadillas bloom open, creating easy-to-share wedges that are perfect for parties or family dinners. With minimal prep and simple ingredients, this recipe is designed for everyone—from novice cooks to seasoned chefs. Serve it alongside your favorite dipping sauces for an irresistible treat that’s sure to impress!
- Prep Time: 15 minutes
- Cook Time: 20 minutes
- Total Time: 35 minutes
- Yield: Approximately 8 servings 1x
- Category: Appetizers
- Method: Baking
- Cuisine: Mexican
Ingredients
- 4 large flour tortillas
- 2 cups shredded cheese (cheddar and Monterey Jack blend)
- 1 cup cooked chicken breast (shredded or chopped)
- 1 cup diced bell peppers (mixed colors)
- ½ cup salsa
- Sour cream (for topping)
Instructions
- Preheat your oven to 400°F (200°C) and prepare a baking sheet with parchment paper.
- Lay out the tortillas flat on your workspace.
- On one half of each tortilla, layer cheese, chicken, bell peppers, and salsa. Leave space around the edges.
- Fold each tortilla in half over the filling and gently press to seal.
- Arrange the folded tortillas in a circular shape on the baking sheet to form a ring.
- Bake for 15-20 minutes until golden brown and crispy. Drizzle with sour cream before serving.
Nutrition
- Serving Size: 1 wedge (80g)
- Calories: 190
- Sugar: 2g
- Sodium: 410mg
- Fat: 10g
- Saturated Fat: 5g
- Unsaturated Fat: 4g
- Trans Fat: 0g
- Carbohydrates: 18g
- Fiber: 1g
- Protein: 8g
- Cholesterol: 30mg
